Introduction
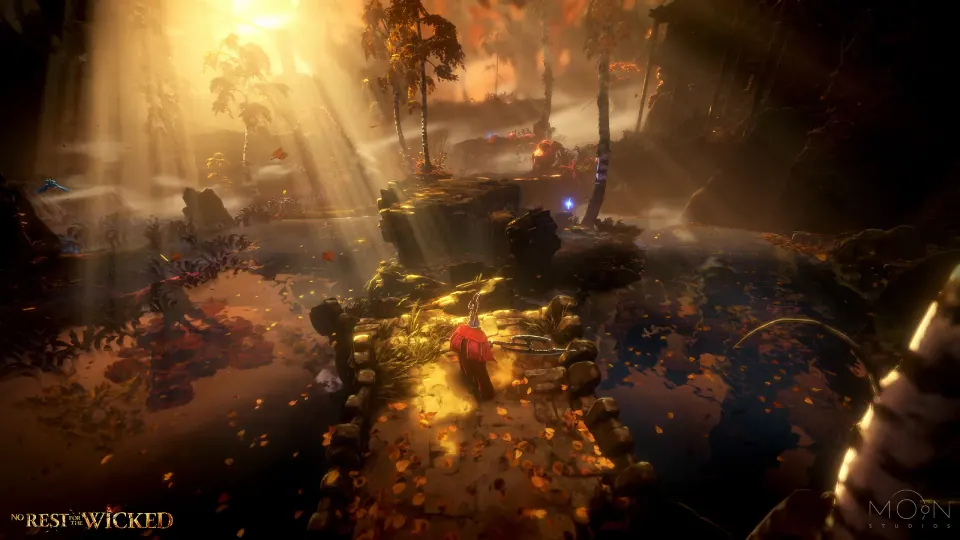
No Rest for the Wicked is an action RPG built around deliberate real-time combat, exploration, loot, crafting, and character development. Moon Studios describes its approach as precision-driven and animation-led: an attack is a commitment, not a harmless button press. That single idea explains many early difficulties. A new player who watches the enemy, manages stamina, and learns one weapon will usually make steadier progress than one who chases every new item.
Use this guide in a practical order:
- Learn a repeatable combat rhythm.
- Explore carefully enough to open routes and gather supplies.
- Choose one usable weapon direction.
- Improve equipment only after testing it.
- Treat every Early Access build as version-sensitive.
If fighting is the immediate problem, start with the dedicated combat guide. If your character feels unfocused, read the Build Hub before committing more attributes or materials.
Does the game have classes?
The current game does not lock a new character into a traditional warrior, rogue, or mage choice at creation. Your practical role emerges from the attributes you raise, the requirements of your weapon, the equipment you wear, and the skills available through that equipment. The developers have discussed a broader class system separately, so do not confuse preview material with the current live progression model. The classes explanation keeps that distinction clear.
Combat Basics
The safest beginner rhythm is observe, defend, answer, reset. Let an enemy reveal the shape of an attack sequence. Avoid or control it, take a short opening, then return to a position where you can see what comes next. Extending every opening into a full attack chain is one of the quickest ways to be hit during recovery.
Preserve an exit
Attacking, defensive movement, and other actions compete for stamina. Do not plan only for the attack you want to make; reserve enough freedom to respond if the enemy continues its sequence. When the stamina display is low, create distance and let it recover instead of trying to force one more hit.
Learn animation commitment
Test the normal sequence, running attack, dodge follow-up, charged option, and equipped skill for a weapon in a low-risk area. Notice how long each action holds the character in place and where the hit actually lands. A move that looks powerful but regularly misses your safe openings is not yet a reliable tool.
Separate defense choices
Dodging, blocking, and parrying solve different problems. Begin with the option you can execute consistently. Parrying can be valuable, but it is a timing test; it is not a requirement for learning every encounter. The combat guide explains how to practise each defensive layer without relying on unverified frame data.
Progression Explanation
Progression is more than raising a character level. It also includes meeting equipment requirements, improving a usable base item, collecting crafting inputs, learning recipes or research systems, opening world access, and understanding which parts of a build work together.
For the first stretch of play, prioritize a functional character over an ideal end-game plan:
- Keep one weapon equipped that you can use without missing its requirements.
- Raise survival and stamina to a level that makes learning manageable before chasing maximum damage.
- Avoid spreading damage attributes across several unrelated weapon directions.
- Compare a complete loadout, because armor and off-hand choices can change weight and defensive options.
- Keep unfamiliar progression items until their purpose is clear.
The leveling guide covers the decision process in more detail. Build pages should be treated as paths, not rigid orders that force every player into identical equipment.
Equipment Choices
Weapon choice determines much of the moment-to-moment experience: reach, attack direction, recovery, attribute requirements, and available skills. Do not choose from one displayed number alone. A beginner should ask:
- Can I meet the requirements without abandoning my current progression plan?
- Can the normal attack sequence connect in the openings I recognize?
- Does the weapon’s reach fit how close I am comfortable standing?
- Does the equipment around it preserve a manageable defensive response?
- Am I willing to spend materials on this base after testing it?
Start with the weapons guide, then narrow the search through the swords, axes, bows, or staves category guides. Those pages explain family-level decisions without pretending every weapon inside a family behaves the same way.
Armor should also be judged as part of the loadout rather than as an isolated rarity upgrade. Equip a candidate set, check how movement and defense feel, and then test it against familiar enemies. A statistically attractive piece can still be a poor beginner choice if the complete setup makes positioning harder to control.
Exploration and Early-Game Advice
Exploration rewards patience and memory. When entering an unfamiliar area, look for the next safe return route before pushing deeper. Open shortcuts when they become available, note doors or mechanisms you cannot yet use, and gather visible resources without assuming every item is immediately expendable.
Use a simple expedition routine:
- Leave with recovery supplies and inventory space.
- Explore one branch far enough to understand its risk.
- Activate or open the nearest return route.
- Bank materials that belong to an active equipment project.
- Revisit blocked paths after acquiring new access or progression information.
Falling, ambushes, and fighting several enemies at once can consume more resources than a planned duel. Move the camera, listen before entering a tight space, and use terrain to avoid taking on an entire group simultaneously. The goal of a first visit is not to clear everything in one uninterrupted run; it is to make the next visit safer and more informed.
Healing and Resource Management
Recovery supplies are part of route planning. Use healing when there is enough space to complete the action, not simply because health is missing. Carry a reserve for learning an unfamiliar encounter, but do not consume every stored ingredient to solve one failed attempt.
Organize inventory by purpose:
- Use now: recovery and utility supplies for the current route.
- Current project: materials for the weapon or armor you are actively testing.
- Keep until identified: keys, quest items, unfamiliar upgrade materials, and version-sensitive items.
- General reserve: common inputs that may support town, crafting, or later experiments.
The items guide explains this separation, while resources, materials, and consumables cover the beginner decisions inside each group.
Crafting Overview
Together changed crafting substantially, including crafting-table structure, item research through the Scribe Table, refinery support, and recipe access. This makes old launch-period instructions especially risky. Follow the interface shown by the current build and verify a guide’s version before spending rare inputs.
A conservative crafting loop is:
- Test the uncommitted weapon or armor base.
- Confirm that its requirements and moveset fit the intended build.
- Identify the material family and station involved.
- Make the smallest investment needed for another meaningful test.
- Save deep optimization for equipment that has already proved useful.
This approach will not produce an instant perfect build, but it reduces the chance of spending an entire reserve on an item you dislike using. Continue with the crafting guide for a system-level overview.
Beginner Mistakes to Avoid
Spending the entire stamina bar
A full attack chain is not automatically a safe attack chain. Stop early when the enemy is recovering faster than expected.
Upgrading before testing
Requirements, animations, and practical reach matter before rarity or potential. Test first, invest second.
Copying an old build without checking its version
Together changed combat, crafting, bows, equipment systems, and progression context. Treat 2024 and 2025 advice as historical until its claims are reproduced in the current build.
Spreading attributes across every interesting drop
New equipment creates temptation to pivot constantly. Keep one dependable direction while collecting candidates for later testing.
Selling or consuming unfamiliar items immediately
An unfamiliar material may support crafting, research, upgrading, a quest, or access. Verify its use before treating it as surplus.
Repeating a boss attempt without changing the plan
Use each attempt to learn one pattern, one safe healing window, or one spacing rule. The boss guide turns that learning process into a repeatable preparation checklist.
A Practical First-Hours Checklist
- Learn the normal attack sequence and recovery of one weapon.
- Practise defending without immediately counterattacking.
- Keep enough stamina to leave a bad exchange.
- Open return routes before carrying valuable materials deeper.
- Choose one broad build direction and review its requirements.
- Store unfamiliar progression items until their use is verified.
- Check the version date on any guide that recommends exact gear or values.
Best beginner weapons
There is no responsibly verified universal “best” starter weapon for every player. A useful beginner weapon is one whose requirements you can meet, whose attacks connect in openings you understand, and whose recovery does not repeatedly trap you. Compare category, requirements, skills, and current verification in the weapons guide, but make the final decision by testing the moveset yourself.
Sources and Confidence
This guide was checked against the official game website, official Together update notes, current-build community category indexes, and beginner-question research from videos. Official sources support the live-system and version context. Category indexes support organization. Practical recommendations are deliberately conservative and contain no claimed frame data, drop rates, or hidden values.
- Author
- No Rest for the Wicked Wiki Editorial Team
- Category
- Guides
- Game version
- Early Access — Together Hotfix 9
- Verification
- published
- Last verified
- 2026-08-10
- Source
- Official game and Together update information, current-build category indexes, and beginner-question research; numerical balance claims and unverified routes are excluded.
Change log
- : Moved to review while version-sensitive claims are checked.
- : Together-era sources and internal links reviewed; guide restored to published.
- : Repositioned the guide as the main beginner knowledge hub without changing verified gameplay claims.
- : Expanded combat, progression, equipment, exploration, crafting, and first-hours advice from the first multi-source content batch.
Related Guides